Quickstart
Welcome to CSC!
This quickstart guide will have you using AI-powered coding assistance in a few minutes. By the end, you'll understand how to use CSC for common development tasks.
Before you begin
Make sure you have:
- A terminal or command prompt open
- A code project to work with
- A CoStrict account
Step 1: Install CSC
Install globally from npm
npm install -g @costrict/csc --registry=https://registry.npmjs.org/
After installation, you can use the csc command.
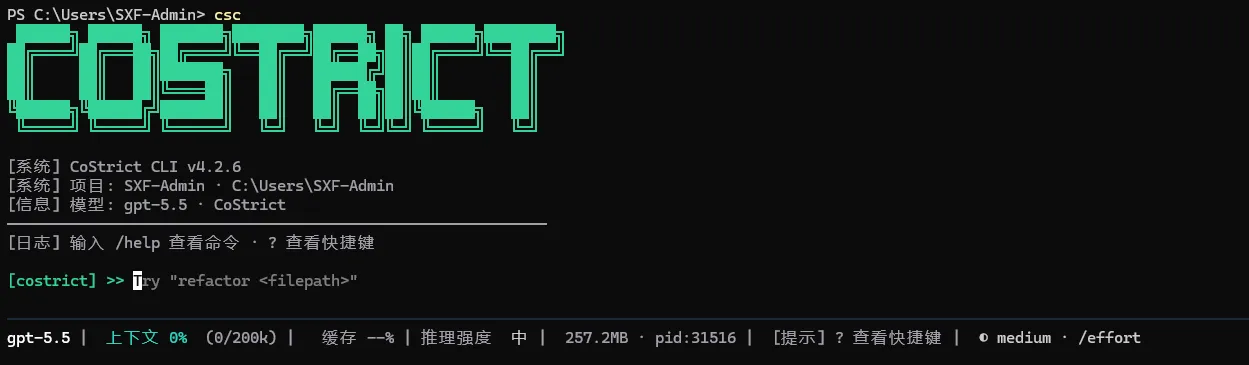
Step 2: Start your first session
Open your terminal in any project directory and start CSC:
cd /path/to/your/project
csc
You'll see the CSC welcome screen with your session information, recent conversations, and latest updates. Type /help for available commands or /resume to continue a previous conversation.
Step 3: Log in to your account
CSC requires an account to use. When you start an interactive session with the csc command, you'll need to log in:
csc
# You'll be prompted to log in on first use
/login
# Follow the prompts to log in with your account
You can log in using any of these account types:
- CoStrict (recommended)
- Custom provider
Option 1: CoStrict Enterprise Login (Recommended)
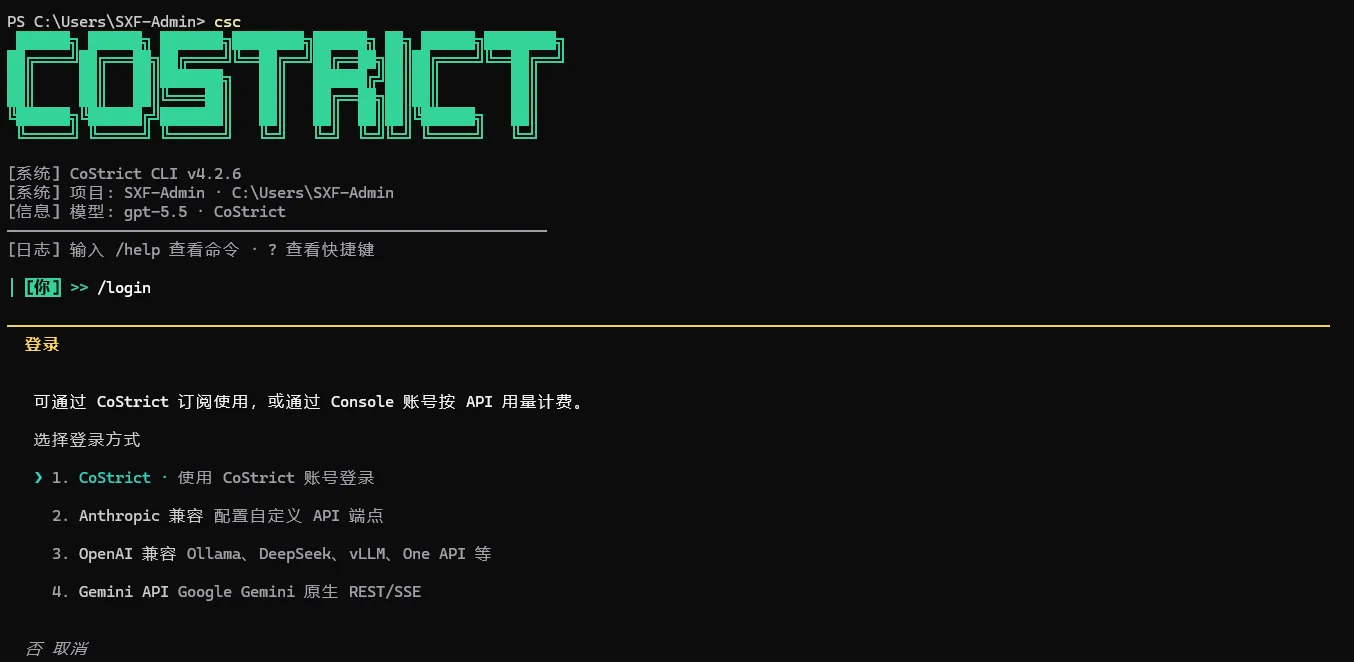
Once logged in, your credentials are stored and you won't need to log in again. To switch accounts later, use the
/logincommand.
Option 2: Third-Party API Direct Connection
Fill in information in the UI
For individual users or self-hosted API services. Select CoStrict Compatible / OpenAI / Gemini, and fill in the following:
| Field | Description | Example |
|---|---|---|
| Base URL | API service URL | https://api.example.com/v1 |
| API Key | Authentication key | sk-xxx |
| Haiku Model | Fast model | claude-haiku-4-5-20251001 |
| Sonnet Model | Balanced model | claude-sonnet-4-6 |
| Opus Model | High-performance model | claude-opus-4-6 |
You can also edit the config file directly
Skip the interactive login and edit ~/.costrict/settings.json directly:
{
  "env": {
    "ANTHROPIC_BASE_URL": "https://api.example.com/v1",
    "ANTHROPIC_AUTH_TOKEN": "sk-xxx",
    "ANTHROPIC_DEFAULT_HAIKU_MODEL": "claude-haiku-4-5-20251001",
    "ANTHROPIC_DEFAULT_SONNET_MODEL": "claude-sonnet-4-6",
    "ANTHROPIC_DEFAULT_OPUS_MODEL": "claude-opus-4-6"
  }
}
Private deployment requires the following configuration:
- For CLI usage, set the
COSTRICT_BASE_URLenvironment variable before starting - After authentication, credentials are stored at
~/.costrict/share/auth.json, which takes priority for server configuration
Step 4: Model selection
> /model # Start switching models
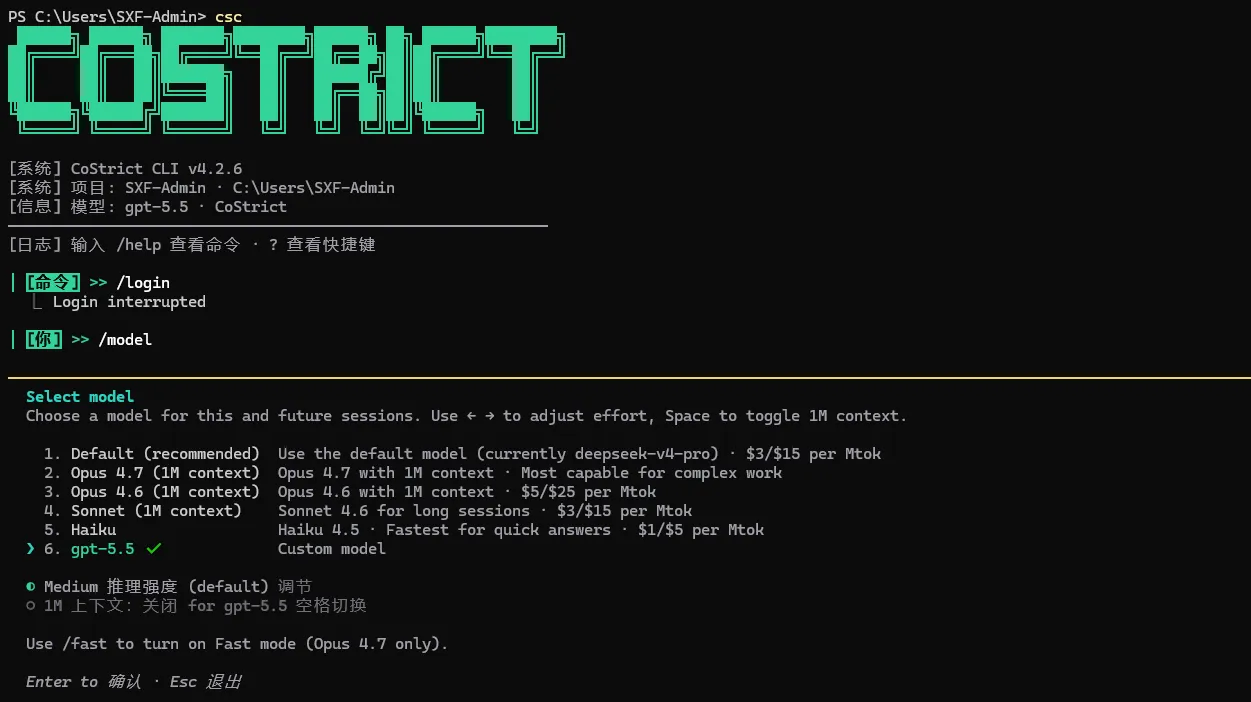
Step 5: Ask your first question
Let's start with understanding your codebase. Try one of these commands:
what does this project do?
CSC will analyze your files and provide a summary. You can also ask more specific questions:
what technologies does this project use?
where is the main entry point?
explain the folder structure
You can also ask CSC about its own capabilities:
what can CSC do?
how do I create custom skills in CSC?
can CSC work with Docker?
Note: CSC reads your project files as needed. You don't have to manually add context.
Step 6: Make your first code change
Now let's make CSC do some actual coding. Try a simple task:
add a hello world function to the main file
CSC will:
- Find the appropriate file
- Show you the proposed changes
- Ask for your approval
- Make the edit
Note: CSC always asks for permission before modifying files. You can approve individual changes or enable "Accept all" mode for a session.
Step 7: Use Git with CSC
CSC makes Git operations conversational:
what files have I changed?
commit my changes with a descriptive message
You can also prompt for more complex Git operations:
create a new branch called feature/quickstart
show me the last 5 commits
help me resolve merge conflicts
Step 8: Fix a bug or add a feature
CSC is proficient at debugging and feature implementation.
Describe what you want in natural language:
add input validation to the user registration form
Or fix existing issues:
there's a bug where users can submit empty forms - fix it
CSC will:
- Locate the relevant code
- Understand the context
- Implement a solution
- Run tests if available
Step 9: Test out other common workflows
There are a number of ways to work with CSC:
Refactor code
refactor the authentication module to use async/await instead of callbacks
Write tests
write unit tests for the calculator functions
Update documentation
update the README with installation instructions
Code review
review my changes and suggest improvements
💡 Tip: Talk to CSC like you would a helpful colleague. Describe what you want to achieve, and it will help you get there.
Essential commands
Here are the most important commands for daily use:
| Command | What it does | Example |
|---|---|---|
csc | Start interactive mode | csc |
csc "task" | Run a one-time task | csc "fix the build error" |
csc -p "query" | Run one-off query, then exit | csc -p "explain this function" |
csc -c | Continue most recent conversation in current directory | csc -c |
csc -r | Resume a previous conversation | csc -r |
/clear | Clear conversation history | /clear |
/help | Show available commands | /help |
exit or Ctrl+D | Exit CSC | exit |
See the CLI reference for a complete list of commands.
Pro tips for beginners
For more, see best practices and common workflows.
Be specific with your requests
Instead of: "fix the bug"
Try: "fix the login bug where users see a blank screen after entering wrong credentials"
Use step-by-step instructions
Break complex tasks into steps:
1. create a new database table for user profiles
2. create an API endpoint to get and update user profiles
3. build a webpage that allows users to see and edit their information
Let CSC explore first
Before making changes, let CSC understand your code:
analyze the database schema
build a dashboard showing products that are most frequently returned by our UK customers
Save time with shortcuts
- Press
?to see all available keyboard shortcuts - Use Tab for command completion
- Press ↑ for command history
- Type
/to see all commands and skills